
Game 36: Maze Master
- Plays All The Things

- Jan 25
- 31 min read
"Through long dark corridors, secret doors, one-way doors, ever aware that deadly monsters can attack at any time, MAZE MASTER is the adventurer's path to fun and peril." - Intro from the Manual I'm playing my second Commodore 64 game for the blog by request - a good friend of mine watched his father play it and there's nothing like reliving those memories.

Maze Master is a Commodore 64 game by a single developer, Michael Cranford, who would go on to work on other RPGs, including the more famous Bard's Tale games - then, having spent his career giving people the opportunity to pretend to slaughter living things , he moved on to teaching and became an ethics professor.
My first task was just to figure out if I COULD play Maze Master, so just starting this one required a bit of research. I've found an online emulator of the game which took a bit of muddling to figure out, and after playing around with it for a bit I realized that I could really use the manual - which I ALSO now have, thanks to the Museum of Computer Adventure Game History.
As you can see from the menu, this is not a complicated game - you can have three characters at a time, each of which can be either a Warrior or a Wizard (so any semblance of 'party balance' is already out of the question here). There's also a 'code' system whereby you can save a character, and from testing I figured out that death happens immediately when a character falls to 0 HP and it is permanent, but the manual also encourages you to make use of the codes - I'm going to initially try playing this by treating dead characters as dead but if that proves too difficult I'll be resurrecting my people via the code system.
We have two objectives - one is to defeat the BALROG somewhere down in the maze, and the other is to solve a riddle - once both are accomplished, victory will be at hand!
On to character creation!
It is suggested that the first character be the party leader. It is wise to make this character a warrior, since he will absorb the brunt of any attacks.

We're off to a cracking start. Dead-man-Dalton up in front has pretty much gotta be a wizard with those stats, I don't think there's a way to re-order my characters. Sure, I could just delete and re-roll, but that would deny Dalton his chance at glory. I'm not just gonna send him back home to his village empty handed!
Ok, so the party is: Dalton, Hera, and Timmy. ALL of them rolled 6 Strength so they're all wizards. Hera has good Dexterity and Constitution but only average Intelligence whereas Dalton and Timmy at least have something going in the brains department (aside from the fact that they're all about to walk into the dungeon with no fighter to protect them).
Before we do that however, we're going shopping! As an example of why you need the manual, this is the shop screen:

The actual list of items and their prices (though not exactly what they do) can ONLY be found in the manual, so I'll be referring to it a LOT.

You characters start with some supply of gold so I'm getting the best armor I can (Wizards at least don't appear to be restricted from wearing protective equipment) and if we can afford a sword after that we'll get that too. To find out how much gold I actually have I have to examine each character individually - this was not an era of great user interfaces and kids these days don't know how hard we had it. Timmy apparently comes from a wealthy family and has over 200 gold whereas Hera and Dalton have scraped enough together to afford Leather armor and nothing else.
That's all the preparation we can do, so we're heading into the dungeon - 3 wizards with one sword between them and hoping our spells see us through.

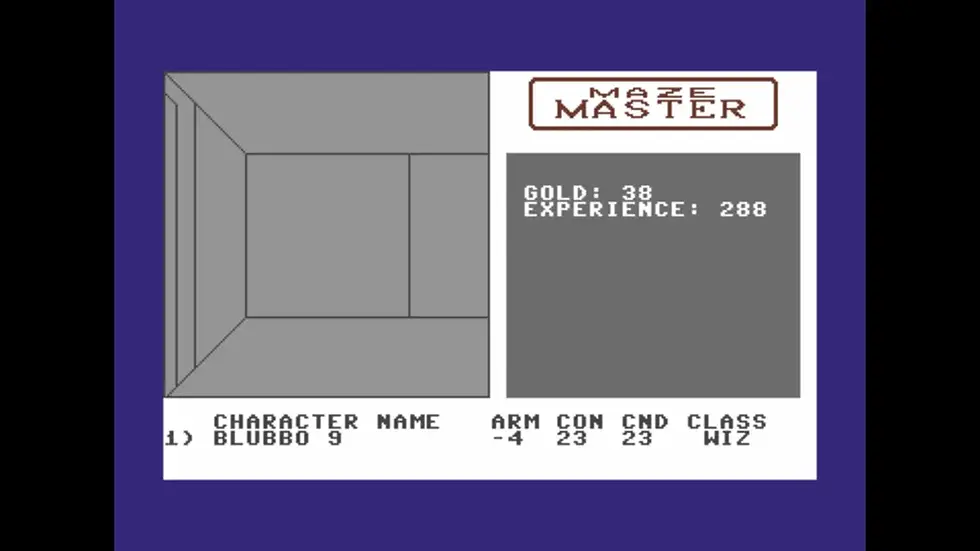
The impressive thing here to me is that we've got a very early first-person perspective of what the maze looks like. Unfortunately it doesn't look like much - the walls are completely featureless aside from the 'door' visible above, so I have no landmarks or other visual references to go on - and I'm already prone to getting lost in games. Getting lost here could easily get me killed as the monsters wander around in real time, so I really need to be making my own maps of the place.
I need to remember to pause the game when I screenshot something, because this FEELS turn based - so when I went to grab a screenshot of the first clue I found....

I had gotten jumped by a pair of goblins by the time I alt-tabbed back to the game. Thankfully there IS a pause key, I just have to remember to use it.

The Monsters got to go first - our armor proved ineffective as Hera took 12 damage (out of 16!) followed by Dalton immediately being killed before he was able to do anything.
Hera and Timmy launch Fireballs and manage to kill one goblin. The remaining monster killed Hera, and Timmy miraculously survived a hit with 2 HP left before bringing the second goblin down.
Timmy immediately turned and ran back for the stairs where he can heal and find new companions, but right when he reached the stairs he ran into a pirate. I tried to flee, got caught, and our first excursion ends in a total party wipe.

Well, surely there is no shortage of brave adventurers, is there? Let's meet our next three great heroes! Stiglord the Mig: He was supposed to be 'the Mighty' but I ran into a character limit - and when you do the name is entered so he'll have to live with it. On the plus side Stiglord rolled a phenomenal 18 strength so he would have lived up to the name. On the other hand he has only 6 HP so I fear he won't live long, but at least we have a Warrior in front now.
Albrecht: Decent strength and HP, so we'll go with another Warrior here.
Joe: Poor Joe. He's got merely average strength but dumb as a post and really shouldn't be risking his life in a dungeon at all. I guess this is the Warrior party. The warrior's foray into the dungeon is more successful than the Wizard party, by which I mean they ran into a pair of scavengers that killed Stiglord the Mig in round 2 (Low HP characters are extremely fragile!), but Albrecht and Joe made it back to the stairs to lick their wounds and recruit another party member.

I guess we make Mrs. Invincible is a really dumb Wizard, to balance out the two Warriors?
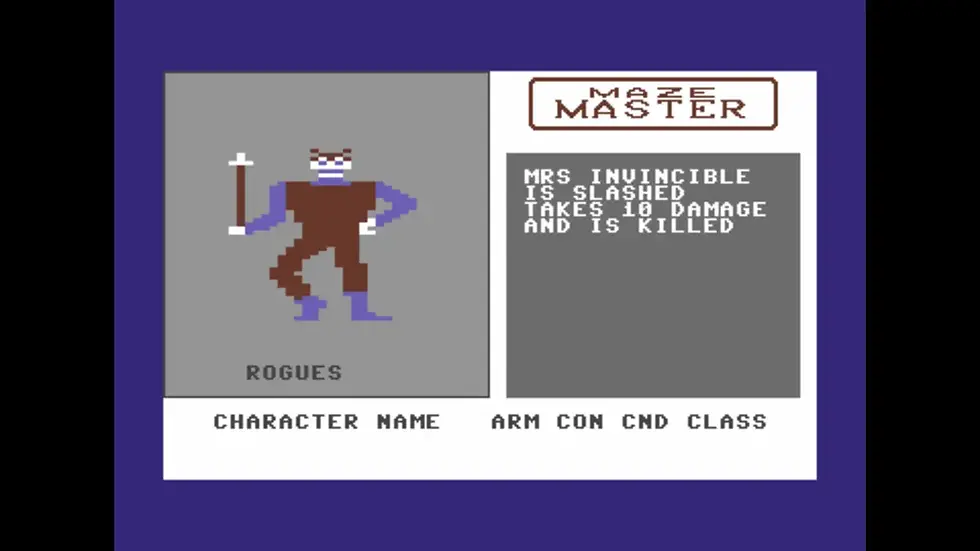
After our first successful no-casualty foray into the maze and out again after killing a Berserker, the party runs into four rogues and I take a crack at fighting them - I should have tried to run.
Ok, I'm not really making progress this way - these early characters are much too fragile and you can easily get locked into combats that will kill you. Even the first maze level isn't at all safe for new adventurers to fight enemies and gain some levels / gold, I need to rethink my approach. It's time to institute some stricter standards of who's allowed into this maze - we're going to send weaklings away (by deleting them) before they get themselves killed and just re-roll characters until we've got a good looking party, and then we're going to write down the character codes and 'resurrect' them if they die so they can actually get more powerful over time.
Ok, I've spent a lot of time re-rolling and now I've got a pretty solid party stat-wise. If anyone dies I'll 'resurrect' them by re-making them with character codes that need to be re-typed (which makes the death penalty in this game a personal annoyance for me). Meet the heroes who are going to conquer this maze: Tonk the warrior is strong and fast and has decent toughness, he'll hopefully be taking most of the hits and living long enough to protect the big guns.
Blubbo is a Wizard who actually is a fair bit tougher than Tonk based on his phenomenal Con score while still being respectable in the intelligence department.
Finally, Marlin is a top-tier spellcaster, but also the most fragile member of the party (though not by a lot). Hopefully being in the back will protect him.
I'm going with two wizards and one warrior because the spells in the manual appear to be very powerful, and I think I can cast any of them right from the start so long as I have the spell points. There's one called Mind Fist which deals 1-32 damage to EVERY enemy and Marlin can cast it (once) right away, so the plan is to venture into the dungeon, smash an enemy encounter, and then run right back out to recharge spell points - then repeat until we get some gold / XP and improve our survivability.

Using this party I pulled off a single excursion into the dungeon without anyone dying.
The second attempt ended in disaster and another party wipe.

I'm hopeful that we won't die so much if we can ever level up but this game does not make it easy. Fortunately we've got extra Tonks, Blubbos and Marlins ready to get in there and avenge their former selves.
Subsequent attempts meet with more success and while I haven't gotten any levels yet, I've now outfitted the party with at least basic gear and improved their armor. Since there's no gear restrictions on the Wizards they're carrying swords and shields just like Tonk is, so if we run into weak single enemies we can conserve spell points.
Scratch that idea - trying to actually have these bozos stab a foe to death to conserve spell points ended in an incompetent flailing of swords and Tonk is dead. Again. I even had to re-enter ALL of the party's character codes just to put Tonk 3 back in the front.
I feel like I've got about half of the first level mapped - I try to visit somewhere new on each outing, and I've actually found the stairs to the second level but I don't dare go down there yet with the enemies here being as difficult as they are.

With no known path back to the start, I picked a door and hoped for the best, attempting to flee from every encounter (I don't think there's a downside to being 'caught' versus choosing to fight).
My map ended up saving me because I knew where I was and had a good idea of where I was supposed to get back to, though I just about had a heart attack when I thought that my map was a single square off somewhere because I found a door where I didn't expect one.

The game has several non-combat spells as well, since I don't have many spell points I haven't played with them too much but 'Light' lets you see farther, which helps a lot with mapping the larger rooms. It also lets you detect secret doors, but it's hard to tell which doors are secret when it's on because they all look the same.


Unfortunately, all you can see is walls and doors - important things like monsters, clues to the riddle, and the stairway to the next level are only revealed when you enter the same square as them. That means in order to find the clues to this riddle I suspect I'll have to fully map each level and take care to ensure that I've stepped on every square, at least until I find all three of the clues. I haven't found treasure or traps so there's not much reason for exploring this maze beyond the clues and the stairway.
Sweet Jimminy Christmas I've been ambushed at the exit stairs - again! First by a group of Pirates who I blew my spells on to kill, immediately followed up by a group of Bladesman (I guess multiple monster groups can hang out in the same square?) - you actually have to step away from the stair square and re-enter it if you fought a battle there to escape, so I did that after the pirates and had to fight again. I initially ran away from the Bladesmen but they were still camping the stairs when I again tried to leave.
Even Blubbo having the maximum possible starting health isn't always enough to save him from being one-shot.

Consulting the manual, I find out why it's taking so long to attain that first level - I need a whopping 1024 experience points to level up, and after many battles the three stooges are in the 200-300 XP range. That means getting to level 2 is going to be an absolute slog, but the good news is that EVERY 1024 XP will net me another level - so unlike most RPGs the first level is going to take the longest and when things get going I'm going to get later levels relatively quickly (I hope).
On the plus side I've gotten everyone's armor down to +1 or 0 from buying equipment (this is old D&D style 'armor class' so lower is better) and that's been very helpful in keeping my characters alive.

I'm enjoying the pixel art of the monsters - the skeletons in particular are pretty great so I'll try to remember to screenshot them next time I run into them. Almost all of them so far are some sort of humanoid - even ones that probably shouldn't be.

The map of the first floor is really coming along, and I noticed that I had found two nearly-identical sections of the maze which seemed pretty odd - re-reading the manual carefully I found that the maze levels are 20x20 in size, but the game allows you to cross from one side to the other so they repeat - I'd actually mapped the same structure twice:

You know how I got ambushed by monsters at the stairs before? That's now happened three more times and it's always the same - a group of Pirates is waiting for me, and if I still happen to have enough juice to kill a group of Bladesmen show up to finish the job and wipe the party. I'm beginning to suspect there's a limited number of arrangements of monsters in the maze and this one just feels designed to slaughter your party.
Alternately, they might show up after I've killed a certain number of monster groups on the floor as a sort of sadistic punishment for doing well. Either way I don't think I'll be able to handle them until I hit level 2.
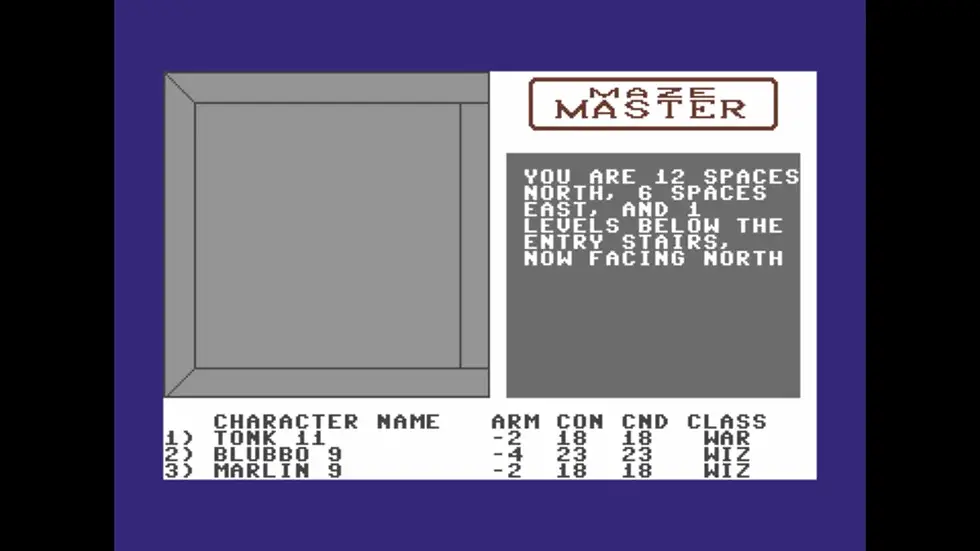
One non-combat spell that's been very useful (especially in conjunction with the map) is Orient, which lets me know my current coordinates.

I'm about 3/4ths of the way through level 1 and I'm making a pretty good amount of gold - Tonk was able to upgrade to a magic sword and Marlin is now carrying the second best shield in the game. If it weren't for the exit stair ambush party I'd only be suffering the occasional death from a lucky hit - as it is I survive most forays into the dungeon except for the occasional exit stair massacre... and also things like having a pair of Ogres go first and immediately kill both mages, leaving poor Tonk to die one round later.
I don't have a 'game play time' handy to know exactly how long this has taken - my guess is 6, maybe 7 hours - but Blubbo and Marlin are high-fiving each other back at the base because they just gained a level. Tonk got left behind a bit in the XP department for dying slightly more often.
There was no celebratory screen for this, and the stat gains aren't as massive as I hoped, but it's an improvement nonetheless. The HP gains are minimal - Blubbo went from 18 to 19, and Marlin is now equal with Tonk at 14. The real prize is a single spell point each - Blubbo now has 3 which lets him cast an attack spell that's twice as strong as the one he's been throwing, and Marlin can now cast a whole new class of 5-cost spells - including Teleport: This spell can be used to move the party to nearly any spot in the maze. Use the joystick controls to indicate the number of squares north to move (a negative value moves you south), the number of squares east (a negative value moves you west), and the number of levels to go down (a negative value moves you up). Teleporting to the bottom level "bounces" you up to the top level.
So long as Marlin stays alive and doesn't cast any other magic I should be able to warp directly back to the exit stairs from anywhere - I'm curious if it can actually warp me past the exit and directly back to safety, in which case I could bypass any stair ambush party.
Speaking of which - I've been mulling over the stair ambush party and the nature of enemies in this game. When I first start up the game I think that all enemy groups respawn (and it's actually the same groups each time, there's always a group of Dwarves inside the first door on the right), and when you venture into the maze and kill a group it seems to stay dead - the longer I play in a single session the emptier the first level gets until I reset the game. I've also encountered the same type of groups that ambush me at the stairs - Pirates and Bladesmen - near each other in the series of three single rooms in the upper-right section of the maze.
This would be a level of sophistication I wouldn't have assumed for this game, but I'm starting to think that maybe those specific groups are moving to the exit stairs to ambush me there - as I finish mapping out the first level, I'll be testing this by specifically not killing those groups, then check whether they're still in their rooms if and when the ambush party shows up.

But before I figure that out.... my first attempt at teleportation was probably the greatest simulation of a wizard trying out a spell that they don't know how to cast for the first time that I've ever seen in a game, because the interface for casting teleport is an absolute mystery to me (and bad, that's a bad interface!). At first I figured that since the game wants numbers (for number of levels down, squares moved, etc) I should type numbers - nope. Then maybe the movement keys adjust the numbers? No. What's left? Banging on random keys and hoping. I DID end up changing the numbers somehow and successfully casting teleport and I wasn't paying close attention I managed to teleport to a random location and have no idea where I ended up - thankfully Blubbo can throw out an Orient spell to figure it out and get us back to the stairs.

I figured it out: The left-right arrow keys adjust each number up and down, and spacebar enters them in.
These controls are not used for any other portion of the game, this is not described in the manual, and the person responsible for this is teaching ethics to college students.
This spell allows you to teleport up to 20 levels down, which gave me another heart attack when I believed I was in for 19 more levels of this, but I checked the manual and it claims there are only five levels in the maze - for the sake of my sanity I'm going to believe the manual here until proven otherwise.
Sadly you cannot teleport past the stairs directly to safety, but it does appear that you can indeed teleport just about anywhere in the maze - I expect to use Teleport extensively as we go deeper.
Back to clearing the maze - I think gaining levels has also increased the number of monsters in these groups. Before they seemed to cap out at 4, now I'm seeing groups of 5 and occasionally 6. Since I'm blowing them away with area spells and then running back to the stairs, so far this is actually a plus for me because I'm getting more XP and gold from each encounter.

Oh hey - Tonk also hit level 2 and gained 3 HP. We're off to the races.
Incidentally, I don't ever move forward anymore. Moving forward doesn't open doors, but the 'kick door' button DOES move you forward even if there isn't a door there, so all I do now is turn left and right and kick doors / air to make my way around the place.
The extra spell points from being level 2 are a game changer, and I'm pretty reliably nuking every group I run into on this floor, with a follow-up spell from Marlin available in the unlikely event that the initial blasts don't get the job done. Mapping and killing is proceeding well and the stair ambush party apparently don't dare to show their faces anymore, and before I'm done mapping out the first level everyone hits level 3 thanks to the larger groups.
Since we're more survivable now I've been saving up money on each character to buy the highest tier shield, 1500 gold apiece and we'll have maxed out one type of protective equipment. Tonk is hitting more often - and harder - but since he can't damage multiple opponents the mages are really the star of the show and I feel vindicated in the 1 Warror / 2 Wizard class split (Although I suspect I might do even better with 3 Wizards). We're even feeling brave enough to occasionally take on two enemy groups before fleeing for our lives.
Now that we've found our sea legs, finishing the map of level 1 wasn't all that difficult.

It's time to venture down to the second level of the maze. I'm feeling pretty confident that the most difficult part of the game - that initial brutal slog to gear up and get that first level up - is behind us.
I.... was not expecting this. I was expecting something similar to the first level where there's a mix of large and small rooms and it's very maze-like. This is very different - Level 2 is a series of criss-crossing infinite hallways.

I'm honestly delighted by this level, it's very cleverly designed to make you lose track of where you are - if I lost track of where I happened to be on Level 1 I could usually just examine my surroundings and compare it to my map and figure out what room I must be in.

Exploring the rooms off of the hallway doors led to monster encounters, but so far I haven't run into anything I didn't already meet on the first level so things weren't too difficult. I may have been overconfident, because I ran into a group of Lurkers which I'd previously blown away with the highest level AoE spell I could muster, and I admit I pulled my punch a bit on these guys so that I'd be able to take on a second group on this excursion, figuring that my -2 and -4 armor and increased HP would keep me safe if any survived.
Two Lurkers survived the initial round. They made the party pay for my arrogance by one-shotting both Tonk and Marlin. The difference between this and the usual party wipe is that with more spell points Blubbo still had enough juice to finish the job.
Interestingly, some of Blubbo's other stats have increased - he started at a respectable Strength 14, now he's at the max of 18, making him as strong as Tonk. I don't regret re-rolling characters until I had good stats at the start because I was stuck with the party as-is for so long, but I suspect that once you start gaining levels then 'normal' characters would eventually see their stats boosted up over time.
New monsters are starting to show up - I fought a group of Trolls that fell easily enough and then ran into these guys:

The Maze Shadows seem almost impossible to hit with melee weapons, I think you just need spells to deal with them.
I've found the next stairway down to level 3 (behind a secret door, as it turns out!) as well as the first clue!

Given that there's five levels and three clues I suspect there's one clue each on levels 2, 3, and 4 but I need to level up characters anyway so I intend to finish mapping each floor before moving on.
Oh, wow! I was genuinely beginning wondering if every single enemy in this game was some form of humanoid, because thus far after dozens of different enemies every single one has been. I just found one that isn't!

Yep, we're gonna need another replacement party. They took me by surprise but in my defense I was not expecting to find four fire dragons in a single-square room which the manual claims is a 10-foot square space.
On re-entering characters I was checking them and noticed that Blubbo has an item I'm pretty sure I didn't buy - it's a fairly expensive one, Magic Armor is the 3rd tier armor and costs 2K gold.
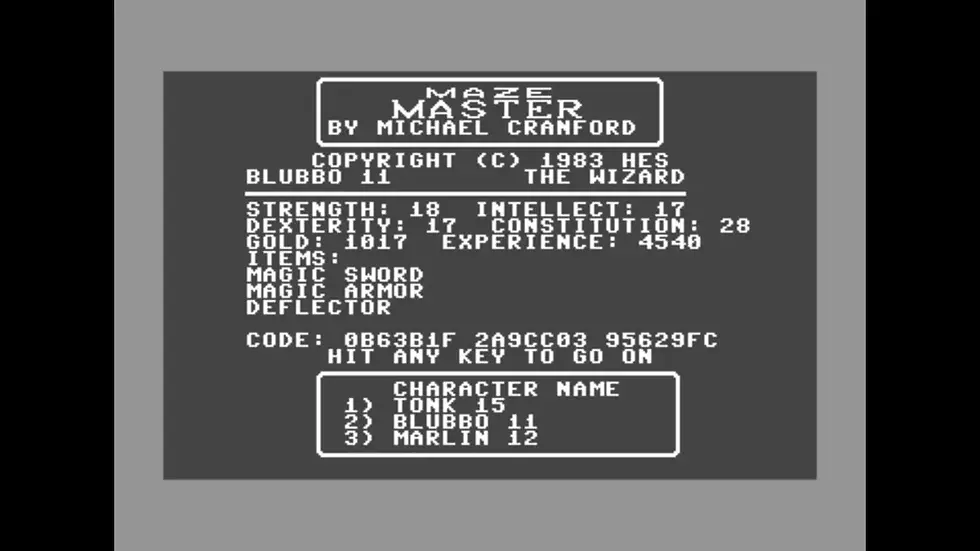
Looking back through my screenshots, I suspect that somewhere in the sixth to ninth iteration of Blubbo I mistyped a character in the codes and possibly gave it to him that way (Unless leveling up can also upgrade your equipment? Surely not.)
I'm just going to pretend that Blubbo 7 or 8 robbed the store and can't be punished anymore because they're already dead - I can't easily un-do the error because I haven't cracked the character code system (and am not trying to). My friend's father apparently beat the game originally by doing so (and given how hard Maze Master is at the beginning I don't blame him one bit for such desperate measures - and reverse engineering the code system is a pretty solid accomplishment in and of itself). Just through casual observation I can tell that the third character of the third code sequence being 6 or 5 indicates whether a character is a Wizard or a Warrior. I probably could engage in a lot of testing the character code entry system to eventually understand all of it and grant my characters additional XP, gold, stats, equipment, etc. Blubbo's thievery notwithstanding, I don't plan to resort to that level of chicanery to beat this - but I will be sharing the final codes for the three stooges so anyone else who wants to take a crack at this can do so with some hardened veterans. Despite the pain of entering codes, I do see some appeal in being able to hand your buddy a piece of paper and say 'Hey, go ahead and use my character when you play the game'.
Encounters with some of the creatures down here are significantly more rewarding - I defeated a pack of 7 Trolls that granted everyone 120 XP, so everyone is leveling up much faster than in the beginning. All my characters now have 20 HP or more and while that still isn't enough to always save them from insta-death (RIP Tonk 15), it definitely helps.
Tonk died this time simply because the monsters went first. Whether everyone in my party survives combat or not often comes down to whether or not the monsters go first, which is either entirely random or possibly based on my dexterity scores. If the monsters go first I have 6 or 7 attacks coming my way and just have to I hope that the character's armor is good enough to avoid damage entirely, but if I go first then the monsters get nuked twice by the most powerful spell in the game and that generally either does the trick or at most leaves one injured survivor - the 'Fire Fury' spells does 1-64 damage against every monster so if the virtual dice crap out I'm not guaranteed to kill everything.
By the end of mapping the second level everyone had 2000+ gold, so Tonk and Marlin bought Magic Armor to get their armor class down further and Blubbo 11 was made to make restitution for his great-great grandfather's theft by re-buying a Magic Armor set for himself, thus paying the shop back without actually improving his equipment.

The interior rooms of level 2 continued with the repeating motif, but because the hallways are monster free I'm not sure how much of a challenge getting lost here actually adds - if you stay in the hallways and wander around you'll find the exit eventually because it's in a distinctive location.
Also I'm pretty pleased that the stairways so far are all relatively close to each other on a straightforward path - even when restarting the game that means there aren't that many monster encounters you have to fight to get down to level 3 - and it's high time I began exploring down there. I think Tonk is level 7 (You only get told you character's XP value) and the mages are level 8. Blubbo has actually maxed out all of his non-Constitution stats to 18.
Level 3 starts off a bit more picturesque than Level 2.

The hallways are not safe this time, right away we're running into enemies I've never seen before. There's no way to tell how strong something is other than by fighting it, so the first time I run into a new enemy type the 'Nuke' dial gets turned up to 11.

In a first for this game I stumble across a warning, perhaps letting me know about some sort of trap.

Being dropped a level doesn't actually sound all that inconvenient so long as I save enough spell points to cast Teleport - I haven't actually used it as much as I assumed I would but until I figure out what this is I'm going to conserve enough to cast it if needed.
I guess the theme of Level 3 is 'secret doors that suck', because the first secret room I found had absolutely nothing in it.

Although I suppose I can sympathize with the dragons, if I were cooped up with four other dragons in a small closet I too would be ready to massacre anyone else that tried to squeeze in with us.
Tonk appears to be attacking twice every round now, so Warriors may not be as non-viable as I first believed. He's got a long way to go to hold a candle to what the Wizards can do.
I'm very unclear about what circumstances cause monsters to 'wander' in this game but something DOES cause it. Most of the enemies seem to be stuck in specific rooms at any given time, but there was the stair ambush party at the beginning and on various occasions I have encountered groups out in the hallways where I didn't expect any (I actually just ran into a group of Lurkers in the Level 2 hallways where I'm confident no monsters initially start). Saving enough SP to cast Teleport nicely handles being trapped by a one-way door - instead of having to find my way back to a mapped area I can pop back to safety after killing the first group I run into.
I have yet to buy any of the 'Miscellaneous Magic Items' because they're very expensive, and Tonk acquires the first one - a Ring of accuracy. The manual has no details on what these items do aside from their names:
Staff of light - I assume it casts a persistent Light spell. That would save me all of 2 Spell Points for the low low price of 5,000 gold.
Ring of accuracy - 1,500 gold. Tonk still misses quite a lot so I'm hoping for a significant hit rate improvement. I probably shouldn't bother and just save up for the best armor because Tonk is best utilized as a meat shield but additional damage doesn't hurt.
Amulet of healing - Another 5K item, normally in an RPG I'm all for an item that will likely give me some sort of HP regeneration, but I'm less enthusiastic about it in this game because combats tend to last one, maybe two rounds at most, and I go back outside the maze to refresh my spell points. Unless this heals me to full every round of combat I doubt it will be all that useful.
Hawk blazon - At 10,000 gold (Which is about how much all of my characters combined have earned to date), this had better do something great but I'm unsure of what it's function is. A 'Blazon' is apparently a 'formal description of a coat of arms', so technically this item is a piece of paper with a paragraph or two that goes on and on about what some Hawk-themed coat of arms looks like, though I doubt that's what Cranford had in mind when he created the item.

An interesting feature of the third level is a room that is just packed full of monsters - prior to this I'd only ever seen at most two groups of monsters in a room and the vast majority have 1. The lower-left room on level 3 is stuffed full of foes - I've killed over half a dozen groups and there are still monsters in there. I've started entering the maze and immediately teleporting directly into that room (it's directly below the level 1 entrance stairs), killing one group, then teleporting back to safety.

The Ring of Accuracy is definitely helpful for Tonk, sometimes he'll actually hit and kill two things with his two attacks.
I've fully mapped out level 3:

I have no idea what that cryptic 'Ware the stop' message was referring to - I was so sure there was a pit trap of some sort and I tried to hit every single square.
I'm actually enjoying this experience, but only because I'm blogging it. The act of making these maps has a zen-like quality to it and I'm enjoying writing about it. The game itself was a terrible slog at first and now has settled into an 'enter maze' - 'teleport' - 'fight' - 'teleport' - 'exit maze' pattern which is pretty repetitive.
Marlin surviving two huge combats as the sole survivor has resulted in him shooting ahead of everyone else in HP - I sigh every time I look at our 'Tank' Tonk and know that he's the least survivable of the bunch.
On to level 4!

The enemies ramp up right away, and in some cases it's a party wipe if they enemies go first. It's not long before Tonk is dead again... and I have an idea.
'Tough fighter in the front, squishy spellcaster in the back' is so deeply ingrained into my psyche that Tonk has now died half a dozen more times than the mages and the XP loss from that has made him measurably more fragile than either of them. Something deep in the core of my gamer heart is screaming that what I'm about to do is just plain wrong, a strange sort of blasphemy, but it's time to change our formation: Big fat wizards to the front! Warrior, cower behind the spellcasters!
With the highest HP total, Marlin takes the lead. We're also down to -8 AC since I have the spell points to regularly cast a -2 AC buff on every excursion, and if I feel the need I could throw an additional -6 AC spell in battle, but in nearly every case I think smashing the enemy with the first spell is a better option.
Not only is the new formation better defensively, it's better offensively too - the characters take their turns in numeric order, so what happened before would be Tonk hitting either the first enemy or a random enemy - it's hard to tell - followed by the mage spells hitting everything. Now the spells hit everything first, leaving just a few survivors - and Tonk follows up to specifically target only the ones that survived the spells, because the rest are already dead. Tonk is up to three attacks so chances are good he'll hit at least once.

This level also has a 'monster party' square in the lower left - I'm starting to wonder if the wandering monsters just tend to congregate on that square and stay there. I rarely encounter them wandering around and that would explain the 'stair ambush party' as well since the initial stairway into the maze is on that square on level 1.

I did some testing and temporarily bought the Staff of Light and Amulet of Healing to see what they do - the Staff is a permanent Light spell as predicted, and the Amulet of Healing restores 1 HP every 20-30 seconds or so. Since my main impetus for returning to the surface is to recover my spell points that's not a very helpful item, so I reloaded the characters to undo making those purchases. If I carried a Staff of Light around I'd never be able to tell which doors are secret and which aren't!
Instead of those, I get Tonk a Wrathblade, the best weapon in the game. It takes his damage into the 60's and 70's, with three attacks he can now out-damage the wizards against single targets. Marlin the Wizard Tank gets the best armor, a Mithril Coat, and Blubbo is going to try to save up for the Hawk Blazon so I can figure out what it does.
The game is getting a lot easier and I'm gaining a level every 3-4 encounters. Switching up the order of the characters was really a turning point and it's actually been awhile since the last character death. Maze Master actually has an inverse difficulty curve - it's incredibly difficult at the start but gets easier as your party's capabilities and toughness outmatch the monster groups. The mages have more than 30 spell points each - enough to teleport down to the lowest level, nuke three or four monster groups, and teleport back home. This is making mapping go much faster.

Oh, I haven't mentioned the game sound because there's hardly any - the sound design in the other C64 game I've played, Impossible Mission, was miles better. There's a 'beep' for finding text and a 'boop' for bumping into a door, a horrible RRRRRRRRRR when you start the game up, and a less horrible rrrrrrr when you run into monsters. That's about the whole soundtrack.
The fourth level had a surprise feature - one-way walls. From one direction, a normal corridor - but if you try to backtrack you'll find the way blocked. I was very confused the first time I encountered one and spent some time believing that I'd incorrectly mapped something, so kudos to Mr. Ethics for thinking that one up.

I see it! The structure that initially made me think that there was some symmetry in level 3... I'm pretty sure I know the answer to the riddle now.
I've actually hit a point where my characters aren't dying anymore, and mapping the 4th floor doesn't take all that long.

I enjoyed how I needed to find both a secret door behind the entry stairs to get out of the starting area and then again to find the stairs down to the fifth floor. I actually didn't find the stairs down until almost the very end of mapping the level, it was the second to last square I checked.
Blubbo has finally earned enough to buy the Hawk Blazon, which appears to just set your AC to a flat -10 no matter what other armor you're wearing. I guess descriptions of a coat of arms have powerful protective properties in the Maze Master expanded universe. That was expensive for -2 AC but I'm running out of things to spend money on, and it's a better upgrade than my other magic item options.
Ok, we're ready to face whatever's at the bottom. Time to descend to the final floor.
As the battle-hardened party of grizzled veterans makes their way down to the Lair of the Balrog, they lay their eyes upon a sight few humans have ever dared to witness. Behold!

The fifth level doesn't allow you to teleport directly into it so to get there I'm Teleporting directly to the downward stairway on the fourth floor. Teleporting out works fine, which I think is a missed opportunity - getting lost / trapped somewhere in the maze and running out of spell points over repeated combats would be one of the few remaining actual dangers to my party.
I haven't run into any monsters on this floor that I didn't hit on the fourth floor... but inexplicably the enemy groups are smaller. I'd run into 6, 7 Fire Giants before, and I just hit a group of 3 now. That's making this final floor even easier than the last one.
I found the riddle to be solved very early in the mapping process - it's actually adjacent to the room with the stairs behind a secret door. I'm going to hold off on answering it because I feel like it would be a disservice to finish the game now and not map out the final floor.

The first new enemies I run into still don't survive a round of combat against the party.

But a little later I hit a group of Storm Giants and they're no joke, turns out there are still some groups that pose a serious threat. I was starting to think I might get through the whole floor without having to type in more character codes.

I'm now very grateful to have Tonk - with these smaller groups of tougher enemies, he's out-damaging a Wizard now. So much of this game is topsy-turvy compared to a conventional RPG - my fighter started out weak but has ended the game stronger than the mages who were much more powerful than him for most of this.
It's taken me awhile to realize this but I think there's some sort of intelligence or level bonus to the damage a spell does - the manual claims Flame Fury does 1-64 damage to all foes but I've never actually seen it do just 1 damage and have seen it do more than 64.
Ok, level 5 is mapped out.

I never figured out what the "Ware the stop" message meant nor did I find a third clue - maybe it's on a square that had a monster on it or maybe I just missed stepping on it. Either way, I was able to correctly answer the riddle, and Marlin 16, Blubbo 17, and Tonk 23 step through the door to face their final foe.

You know, it occurs to me that I'm not actually sure why I'm down here. The manual says something about my liege lord being safe again? He'll probably be fine if he doesn't ever enter the maze, it's not like the Balrog comes out of his lair. Maybe we can just talk...

Ok, well, let's do this.
Blubbo grits his teeth and throws the most powerful spell he's got, singing the beast.
Then it's Tonk's turn. Tonk grips the Wrathblade, passed down from his father. He's here to avenge that father, who fell in the maze. And his gandfather. Also his great grandfather, as well as his great great....

To reward the victorious, our friendly neighborhood ethics professor invites us to play the sequel.

In one last bit of strangeness, you can then continue walking around the room the Balrog was in but you can't actually leave - the poor guy was probably trapped in here and this was a mercy killing. Had Blubbo also died then Tonk would be trapped in here too, but we can still teleport out and tell everyone except Mrs. Marlin 16 the good news.
I'm glad I got through that initial slog and got to see this one through to the end - I can't in good conscience recommend that anyone else play it outside of historical curiosity, so I hope that I've conveyed what it's like to play this without actually making any of you suffer through the initial parts.
If you DO want to give it a whirl, feel free to make things easier on yourself by using the maps here - and if you really want an easy time of it, feel free to invite Marlin 17, Blubbo 17 and Tonk 23 onto your computer.
Marlin 17:
0873f1a
265d230
e06a5f9
Blubbo 17:
0b73f13
2578a30
9f6a6ff
Tonk 23:
0d73f12
213ec30
e45a6fc
They'll be happy to head down there and smash the Balrog in your capable hands.
That jerk needs to pay for killing Marlin 17's dad.


Comments